
Download the app on Google Play
Call Control Android
Call Control Settings Overview
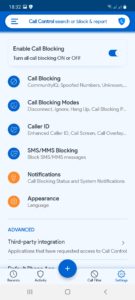
Enable Call Blocking – this option will enable or disable all call blocking by Call Control.
When this option is ON the toggler will be blue.
When it is OFF the toggler will be gray or black.
Further in the General Settings, you can select the main pages of the Settings.

Under the “Advanced” section there are the options:
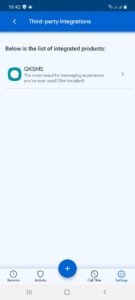
Third-party integration – after tapping this section the list of integrated products will be shown.
Default Phone App – this option switches Call Control to be your Phone app. You can continue to use the Favorites, Recents, and Contacts of your phone.
On many phones making Call Control your default Phone app brings better call blocking results and lets you choose more call blocking modes.
What call blocking options can I choose in Call Control?
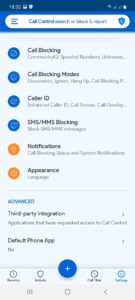
Under General Settings – Call Blocking section you can turn ON the following options:
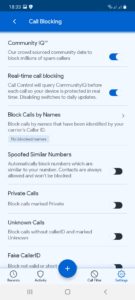
CommunityIQ – enables or disables automatic blocking of spam and nuisance callers on our community blacklist. The Community Blacklist is regularly updated based upon the volume of user complaints that we receive about a given caller using an algorithm that takes into account the activity of over 3 million Call Control users and monitors over 5 million telephone numbers. The most active spam callers are added to the Community Blacklist and are blocked automatically.
Real-time call blocking – this is our new option which provides better protection against different spam numbers in real-time. If this option is enabled Call Control will request the info from the CommunityIQ before you get each call and will handle calls according to the obtained results.
Block Calls by Names – this feature helps in blocking the callers by the names which were identified by the carrier`s Caller ID.
Spoofed Similar Numbers – Call Control will block incoming calls from the numbers similar to your number in the first six digits. The contacts starting from the same digits will not be blocked.
Private Calls – incoming calls with “Private” listed as their caller ID will be blocked when this setting is enabled.
Unknown Calls – incoming calls with “Unknown” listed as their caller ID will be blocked when this setting is enabled.
Fake Caller ID – if Call Control detects that the incoming caller ID is not valid or spoofed, Call Control will block these calls automatically when this setting is enabled.
Non-Numeric Numbers – Call Control will block calls and text messages in which the phone number contains non-numeric information such as letters or special characters when this setting is enabled.
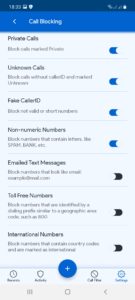
Emailed Text Messages – Call Control will block the numbers that look like email addresses when this setting is enabled.
Toll Free Numbers – Call Control will block incoming calls from the numbers that are identified by a dialing prefix similar to a geographic code, such as 800, 888, 877, 866, 855, 844, 833, etc.
International Numbers – this option blocks the numbers that include country codes and are marked as international. You’ll need to choose your country to use this option.
What call blocking modes can be enabled in Call Control?
On this page, you can choose in what way you want blocked calls to be handled by default.
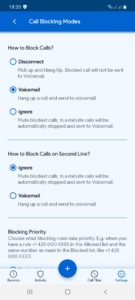
Disconnect – this mode briefly answers the incoming blocked call and immediately hangs up (pickup and hangup), which ensures the blocked caller is not able to leave a voicemail message.
Send to Voicemail – this mode sends the incoming blocked call directly to voicemail, without ringing your phone.
Ignore– this mode mutes the ringer on incoming blocked calls and texts. If you don’t hang up, the calls will be sent to your voicemail.
How to block calls on second line (Call Waiting Blocking Mode) – choose how you want to block calls while you’re on the phone.
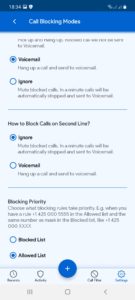
Blocking priority – in the event that you create conflicting rules in your Blocked and Allowed lists, this setting establishes a priority of which list will take precedence in the event of a conflict. For example, when you have a rule +1 425 000 5555 in the Allowed list and the same number as a mask in the Blocked list, such as +1 425 000 XXXX, the Blocking priority option will decide whether to block this number or not to block it.
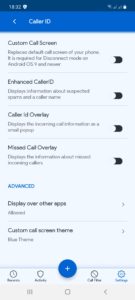
What options can I activate in the Caller ID page of General Settings?
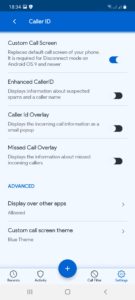
Custom Call Screen – this option replaces the call screen of your phone. You can switch to the custom call screen of your phone app or to the call screen of Call Control that will show integrated information about the caller. Not all blocking modes are supported on all phone models and OS versions, this option gives you better flexibility. You may wish to not use the custom call screen of Call Control, but you will still be able to enable certain blocking modes. Or you can choose to use the custom call screen of Call Control and all the blocking modes will be supported.
Enhanced Caller ID – the feature which identifies unknown callers, businesses, and individuals by displaying a banner with information about the caller provided by Call Control when the call comes in to your phone.
CallerID Overlay – displays the incoming information about the caller as a small popup.
Missed Call Overlay – displays the information about missed incoming calls. The overlay includes additional options, such as ‘Suggest a better name’, ‘Call back’, ‘Block and report’, ‘Unblock’.
Advanced:
Display over other apps – the permission to allow Call Control to display on top of other apps you may be using. This permission is needed for CallerID Overlay to show when incoming calls are calling.
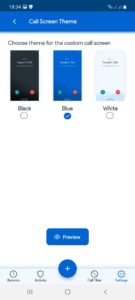
Custom call screen theme – choose Black, Blue or White custom call screen.
Where can I find SMS/MMS page to enable text message blocking?
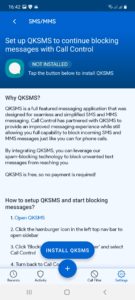
Choose the Settings page in the bottom navigation bar, then tap the section SMS/MMS Blocking:
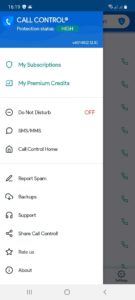
Or tap the sandwich icon in the top left corner of the screen to open the sidebar, choose SMS/MMS section:
Please note, that you’ll need to integrate with QKSMS app to start blocking text messages by the CommunityIQ or the rules set in Call Control.
How to integrate QKSMS to Call Control?
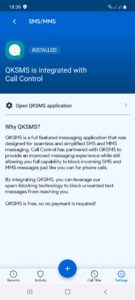
We made it possible to integrate third-party apps with Call Control. The first app we are happy to present is QKSMS which has many useful features for your messaging. SMS and MMS messages will be blocked by QKSMS according to the rules you set in Call Control.
To start using this functionality go to the General Settings in Call Control by choosing the Settings icon in the bottom navigation bar and choose SMS/MMS Blocking:
Or tap the sandwich icon in the top left corner of the screen to open the sidebar, choose SMS/MMS section:
On the Messaging page you can read the description of QKSMS, the instructions on how to set up it and the option “Install QKSMS”, by tapping it you’ll be redirected to Google Play to download the free app:
You can also swipe down the Settings page and under the ‘Advanced’ section click ‘Third-party integration’. Choose the needed app there and you’ll be redirected to download it from Google play or if you are integrated you will be re-directed to the third-party app itself.
In the Blocking page of QKSMS under Blocking Manager section you need to choose Call Control app which will handle blocking messages to your phone.

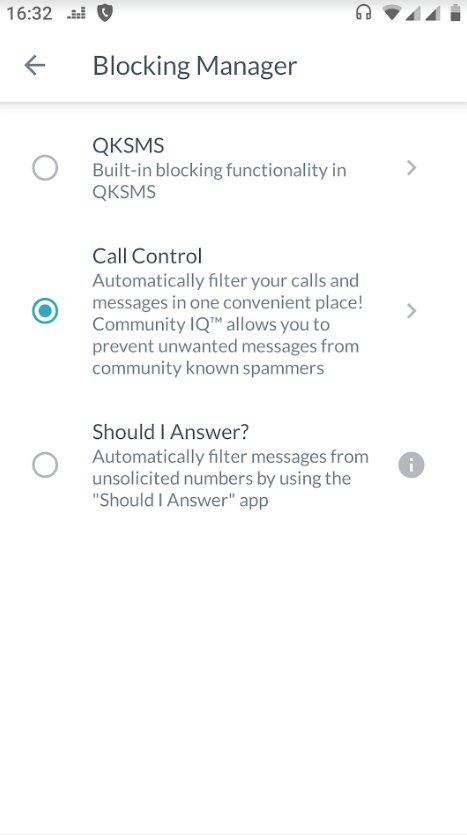
That’s it, you are good to go and block unwanted messages with the help of Call Control and QKSMS.
How do I remove notifications in my status tray?
You can remove notifications in the “General Settings” of Call Control app. In the “Notifications” section find and disable the notification you would like to remove.
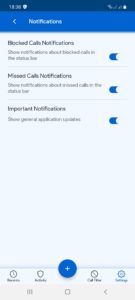
Blocked Calls Notifications – show (or hide) notifications about blocked calls in the status bar.
Missed Сalls Notifications – a setting to show or hide missed calls in the status bar.
Important Notifications – disable or enable general application updates.
You can disable all notifications by navigating to your phone Settings, tap Apps & Notifications, find and tap Call Control. Then click on App Notifications and there will be shown the categories which you can un-check in order to disable Call Control notifications.
* The procedure above is for the Pixel 3 and may vary slightly depending on your phone and Android operating system version. Please note, that Call Control may work incorrectly if you disable the notifications from the app in your phone settings.
Where can I change the language of Call Control?
You can do it in the General Settings under the Appearance section:
Application Language – choose in what language Call Control will be shown to you.
Where is the Legacy interface of Call Control?
The legacy mode is outdated due to the latest trends in app design and requirements from Google Play, we no longer offer to enable it.
The main design of the application offers the same options and even more possibilities, such as Contacts, Dialer from the Recents page of Call Control.
What is the easiest way to block or allow any number in Call Control?
In the bottom navigation bar, there is a blue button with a ‘+’ (plus) symbol. Tap it and you will see the options to Block or Allow different types of numbers.
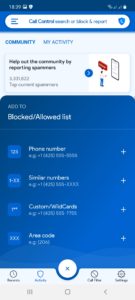
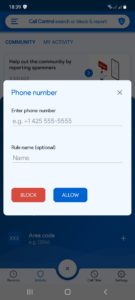
If you want to block or allow any phone number tap the option ‘Phone number’ or the ‘plus’ symbol to the right of it. You will see a popup, enter a phone number or a name in the provided fields and choose ‘Block’ or ‘Allow’.
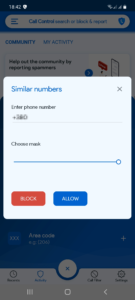
If you want to block or allow similar numbers tap the option ‘Similar numbers’ or the ‘plus’ symbol to the right of it. You will see a popup, enter a phone number in the provided field, choose the mask for this number and tap ‘Block’ or ‘Allow’.
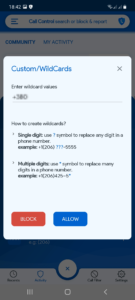
If you want to block or allow a custom/wild card number tap the option ‘Custom/WildCards’ or the ‘plus’ symbol to the right of it. You will see a popup, enter a wildcard value in the provided field and choose ‘Block’ or ‘Allow’. You can use the tips for creating wildcards, they are shown under the field for entering a wildcard.
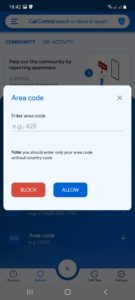
If you want to block or allow an area code tap the option ‘Area code’ or the ‘plus’ symbol to the right of it. You will see a popup, enter an area code in the provided field and choose ‘Block’ or ‘Allow’.
Note, that you can only enter the area code from your country, but without a country code.
Why do I need to set Call Control as my default Caller ID and Spam Detection app?
On the phones with Android OS 10 and newer there is no need to make Call Control your default Phone app. Google added new changes to its API and now requests to make Call Control as ‘Caller ID and Spam Detection app’. Call Control needs this permission to correctly identify and block calls that call your phone.
This change doesn’t influence on any default features or options of your phone and won’t prevent you from using them.
How to use Do Not Disturb in Call Control?
You can use Do Not Disturb (DND) to schedule times which you do not wish to be contacted, blocking all calls when enabled, and you can add exceptions to the DND such as your Contacts or Allowed list.
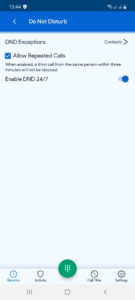
Overview
Do Not Disturb mode when enabled will block all calls according to your default blocking mode which is configured in General Settings. You can set up schedules for each day of the week or enable DND mode 24/7.
How to Get Started
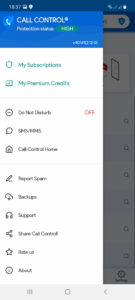
Tap on the sandwich icon in the top left corner or swipe from the left edge of your screen to reveal the Sidebar. Then tap on Do Not Disturb.
Tip: The settings drawer will quickly indicate if DND mode is active, the screenshot below indicates DND is off.
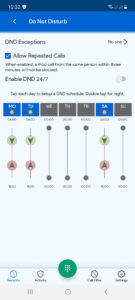
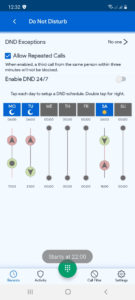
Do Not Disturb Overview Screen
This screen is comprised of three main elements:
1. The Scheduler – this is where you setup your schedules when DND mode is to be enabled.
2. DND Exceptions – tap to configure exceptions to the DND mode who will be allowed even when DND is enabled.
3. Enable DND 24/7 – tap to enable DND mode all day, every day.
The Scheduler
To set up specific days and times you want to block calls, start by tapping the day of the week you want to schedule. Tapping once puts the scheduler in day mode, tapping twice puts the scheduler in night mode.
Day Mode
The green arrow indicates when DND mode will START, the red arrow indicates when DND mode will END. Tap and hold the arrows and drag them up and down to change times. The times along the top indicate the start time, the times along the bottom indicate the end time. The RED line in between indicates that calls will be blocked during that timeframe.
Tip: You can easily copy a schedule you’ve created by tapping other days of the week.
Night Mode
Tapping the day of the week twice changes DND into night mode. The green arrow indicates when DND mode will START, the red arrow indicates when DND mode will END. Tap and hold the arrows and drag them up and down to change times. The times along the top indicate the start time, the times along the bottom indicate the end time.
Tip: The red line shows in the morning and evening indicating that DND mode is active overnight.
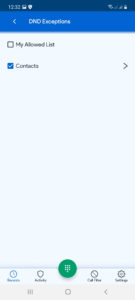
DND Exceptions
This is where you can configure exceptions who will be allowed to call you even when DND Mode is enabled. You can add your Allowed List, Contacts or a subset of your contacts by tapping the arrow to the right of the Contacts label.
For example, a common configuration is to enable DND mode 24/7 but always allow calls from contacts.
Enable DND Mode 24/7
Enabling this setting will enable DND mode all day, everyday and will block all incoming calls and text messages according to the default blocking mode you have configured in General Settings.
How to block all calls except contacts
A popular question we receive is how to set Call Control to block all calls except for callers from your contacts list. You can quickly set this up by tapping the DND 24/7 checkbox and then tapping Exceptions and tap the Contacts checkbox.
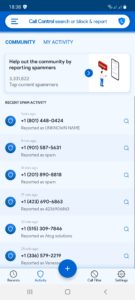
How do I block and report a Robocaller that wasn't blocked by Call Control?
Call Control will block a majority of Robocalls automatically, but occasionally you may get a call from an unwanted caller. If that happens it’s simple to block that caller from ever calling you again!
Simply navigate to the Recents, tap the caller you want blocked and tap Block. You can optionally provide details such as the caller’s name, type of call and/or any comments about the caller which are reported to help improve the Call Control service.
How do I log into the Call Control app on my device?
After downloading Call Control you need to login or create an account.
This ensures all of your settings, including block and allow lists, are saved in case you replace your device.
You can login or create the account with one of the following ways:
Social Networks (Facebook or Google)
Facebook:
1. In the Join our Community page click on the Login With Facebook button.

2. This will take you to the Facebook Login page.
3. Enter your Facebook username and password and click Log In.

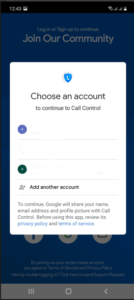
Google:
1. In the Join our Community page click on the Google button.
2. You will be shown the pop-up message with your current google account or you can tap Use another account and enter the other email.
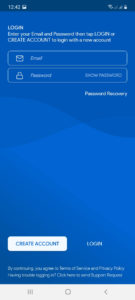
Log in with Email:
In the Join Our Community click the envelope button and in the next Login page enter your email address and password and press on the option Create Account
* When entering your email please make sure there are no spaces before or after your email, because it will be read as invalid.
Log In:
If you have previously created an account using the email address, follow the steps below.
1. In the Join our Community page click on the envelope button.
2. In the Login page enter your email and password and tap Login.
* When entering your email please make sure there are no spaces before or after your email, because it will be read as invalid.
How do I recover my password to login to Call Control?
If you forget your password and can no longer access your account, here are a few quick steps to recover your password:
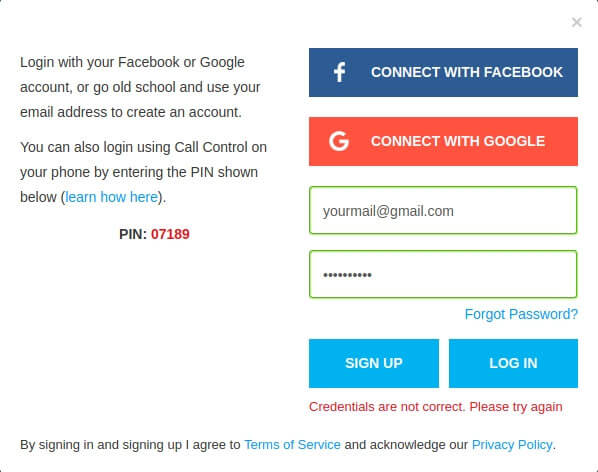
On Everycaller.com:
Simply click the “Forgot Password?” button after and an email with your new password will be sent to the email address registered on your account.
On Call Control App:
After three attempts to sign it with an incorrect password, you’ll be shown the following dialog:
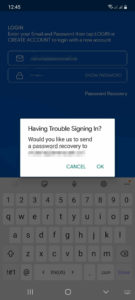
Click on ‘OK’ and the email with your new password will be sent.
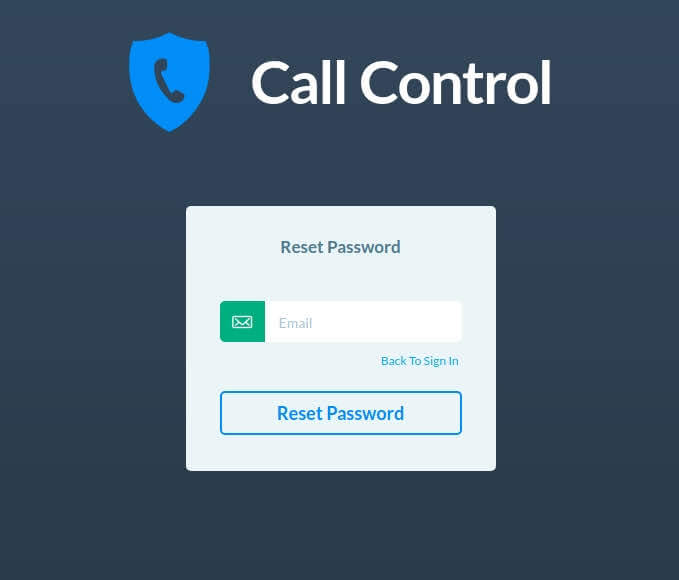
On portal.callcontrol.com:
in the Sign In page you’ll need to click on the option Forgot your password?
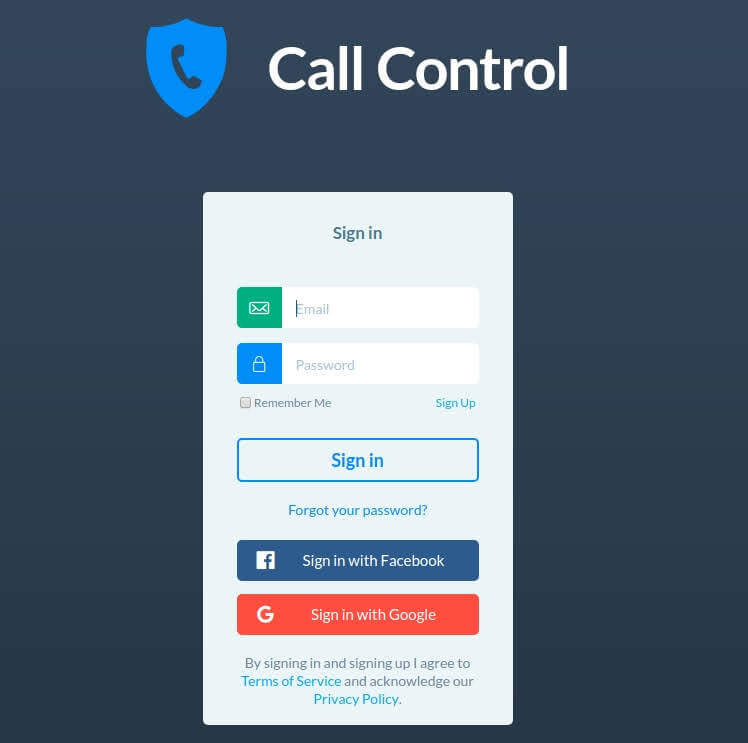
Then enter your email and press on the option Reset Password.
After that your new password will be sent to the email address registered on your account.
*- If you submitted a request to reset your password, but don’t receive an email, please check your junk and spam folders.
– If you need help with your password, please contact us at support@callcontrol.com.
How do I search for an unknown caller's name in Call Control?
There are two ways to lookup the caller’s name of an unknown number from within Call Control:
1. Lookup a number from Recent Calls.
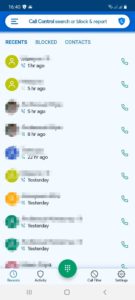
You can quickly lookup a number from your Recent Calls screen. ‘Recents’ is the first icon from the left in the bottom navigation bar.
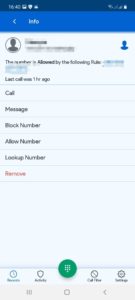
Then for the number you want to lookup, tap it and choose the option ‘Lookup Number’.
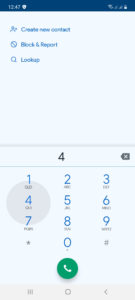
2. Enter the number manually by tapping the search icon.
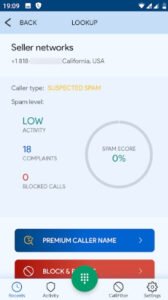
Choose ‘Lookup’ icon, enter the number you want to lookup, e.g. +1(818) 738-7584 and then tap the search icon (the magnifying glass).
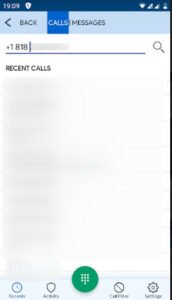
Results we have in our database will be displayed!
Where is the Dialer within Call Control located?
We`d like to let you know that now it`s possible to make the calls using our Dialer. You can quickly find it directly in Call Control app. For this open Call Control app and navigate to the Recents page, then tap a green button under the Recents and you`ll be shown our redesigned Dialpad:
How to restore your subscription after you’ve created a new account?
In case you purchased a subscription via Google Play and logged with a different account, Google Play needs to synchronize with Call Control in order to activate and retrieve the subscription on your new account.
Please follow these steps to retrieve and activate your subscription:
1. Make sure you are logged in to Google Play using the account you used when you purchased the subscription to Call Control.
2. Open Call Control, tap on the sandwich icon at the top left corner (or swipe left-to-right starting from the left edge of your screen) to reveal settings drawer, select the My Subscriptions, then wait for 10 or 20 sec while Google Play updates your subscriptions.
You can make sure your subscription to Call Control Premium is activated by swiping the screen to the right to reveal the sidebar. At the top of it, you will see Protection status: High. You can also go to the About screen from the sidebar and your subscription status will be shown there.
Let us know if you need further assistance at support@callcontrol.com
How do I redeem my Promo code?
Go to Call Control Settings by swiping the screen to the right or by tapping the sandwich icon in the top left corner from the main screen in the app, then choose the ‘My Subscriptions’ section. Scroll down on this page, to the bottom where you’ll see the ‘Purchase Code’ section. Enter your code in this field and push ‘Redeem’. After this, your High Protection status will be shown at the top of the sidebar.
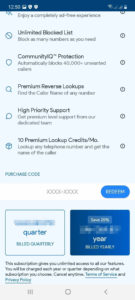
You can also enter a purchase code at the bottom of this promotional popup after you create an account with us:
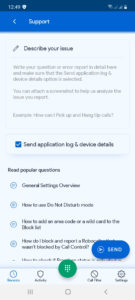
How to send Support Request from Call Control app and provide details of the problem?
You can send us this data from Call Control Settings by swiping the screen from left to right or by tapping the sandwich icon in the top left corner. Find the section “Support”, add any relevant description of your issue in the “Support” page, tap “Send”, you will be redirected to your mailbox to send this data from your phone. Before sending, please make sure, that the option “Send application log and device details” is checked: